To see a full working example of this tutorial, please Click Here
To download a working example of this tutorial, please Click Here [GitHub]
This tutorial will cover the following:
- Including Google Maps API Script
- Finding and specifying the latitude and longitude to be used for the map
- Controlling Map Options
- Creating the map and applying options to it
- Changing and animating the default location marker pin
- Customizing the style and colors for the created map
- The Necessary HTML and CSS
- Wrapping it up!
- Cleaning The Code with jQuery
So, let us get started!
1. Including Google Maps API Script
To use Google Maps API, simply include the following in the “head” section of your code:
<script src="http://maps.google.com/maps/api/js?sensor=false" type="text/javascript"></script>
The (sensor=false) specifies whether your application uses a sensor or not. For our case, we just want to display the map based on our own specified location or a business location, so, we will not need the sensor function.
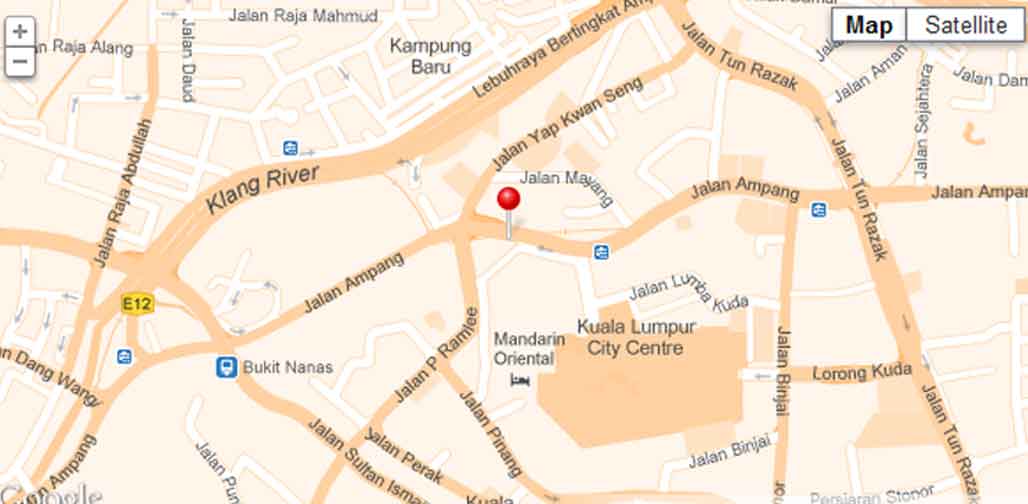
2. Finding and Specifying the Latitude and Longitude to Be Used For the Map
Before you do this, you will need to find the latitude and longitude of the place you want to be shown on the map.
To do this, simply head to Google Maps and search for your place. Once you find it, right click on the marker pin and click on “what is here?” A green arrow shall appear now and your latitude and longitude will appear on the search box at top. Note that there will be two sets of numbers separated by commas. The first one is the latitude and the second is the longitude. Copy those numbers and continue with this step. For this example, I am using the latitude and longitude of KLCC (Petronas Twin Towers).
Now it is time to create the variable that will define the latitude and longitude we want to center our map at. To do this, use this script after you have initialized the Google Maps API:
<script>// <![CDATA[
function initialize()
{
varlatlng = new google.maps.LatLng(3.158578,101.711702);
}
// ]]></script>
3. Controlling Map Options
After we have loaded the Google Maps API and created our function to initialize the map’s latitude and longitude, it is now time to customize some few options that the Google Maps API offers. We will modify the following options in this tutorial:
- zoom: This option defines the zoom level our map uses when initialized, users will still be able to zoom in and out using the default Google Maps arrows.
- center: Defines the center of our map.
- mapTypeId: This option defines which map view is loaded. You can load a road map, a satellite map, and other views.
- streetViewControl: This option if set to false will make the street view option on the top left corner disappear.
- navigationControl: This option if set to false will make the navigation arrows disappear. This will prevent the users from zooming in and out.
- navigationControlOptions: This will define the style of the navigation arrows. If set to default, the arrows will automatically be adjusted to fit in your map.
- mapTypeControl: This option if set to false will hide the map types on the top right corner of the map.
- mapTypeControlOptions: This specifies the options for the mapTypeControl and can be used to add your own map types.
So, to control these options, look at the code below, this will amend the function we wrote earlier:
var opt =
{
center:latlng,
zoom:15,
mapTypeId: google.maps.MapTypeId.ROADMAP,
navigationControl:true,
streetViewControl:false,
navigationControlOptions: {style:google.maps.NavigationControlStyle.DEFAULT},
mapTypeControl:true,
mapTypeControlOptions: {style:google.maps.MapTypeControlStyle.DEFAULT}
};
Note that these are not the only available options. There are many more. For a better and more detailed reference, refer to Google Maps API Documentations on Control Options from here.
4. Creating the Map and Applying Options to It
Once our map location is defined (latitude and longitude) and once our options are ready, we can now create our map object and apply our options to it. The map will be displayed within an HTML element using its ID. For this example, we will use a “div” with (mymap) as its ID. Now we will again amend our function:
var map = new google.maps.Map(document.getElementById("mymap"),opt);
5. Changing and Animating the Location Marker Pin
With the new Google Maps API, it is possible to use your own marker pin image instead of the default red pin. You might want to use a different color pin, or your own business logo.
It is also possible to make the marker pin bounce or drop to the location of the set latitude and longitude. Currently, these are the only two available animation types. To use this on our map, we will amend this to our function:
var marker= new google.maps.Marker({
position: new google.maps.LatLng(3.158578,101.711702),
clickable: true,
animation: google.maps.Animation.BOUNCE,
map: map,
icon: 'images/marker.png'
});
Make sure the path in the (icon) option points to your image correctly.
6. Customizing the Style and Colors for the Created Map
The final step now is to try and customize the style of our map. With the new Google Maps API, it is possible to change the overlay color of the map, change the color of roads, architectures, landmarks, labels, icons, and many more. We will amend the following styles to our script and assign them to the map we have created earlier. These styles will give our map an orange color overlay and it will change the text labels to a dark grey color instead of the default black with the yellow stroke around it. It will also change the font weight.
var styles =
[
                {
                featureType:     "all",
                elementType:   "geometry",
                stylers:
                [
                {hue:     "#ff8800"}
                ]
                },
                {
                featureType:     "all",
                elementType:   "labels.text",
                stylers:
                [
                {color:   "#4e4e4e"},
                {weight: "0.1"}
                ]
                }
];
map.setOptions({styles: styles});
Note that we have not used much of the styling capabilities. So, it is always a great idea to explore more styling options at Google Maps API Documentations on Maps Styling from here.
7. The Necessary HTML and CSS
For the map to work, it is necessary to create a “div” with the ID (mymap) or whatever ID you have used for the map in the initialize function. So, in order to do this, add this code to the place where you want your map to appear:
<div id="mymap"></div>
You will also need to load the script in your “body” tag using javaScript:
<body onload="initialize()">
As for CSS, we only need to specify the width and the height for our map . To do this, add the following to your style sheet:
#mymap {width:590px; height:300px; margin:50px auto 0px 50px;}
8. Wrapping it Up
So, let us wrap up everything, below is the full code for this tutorial.
This part goes into the header section of your HTML code:
<script src="http://maps.google.com/maps/api/js?sensor=false" type="text/javascript"></script>
<script>// <![CDATA[
function initialize()
{
var latlng = new google.maps.LatLng(3.158578,101.711702);
var opt =
{
center:latlng,
zoom:15,
mapTypeId: google.maps.MapTypeId.ROADMAP,
navigationControl:true,
streetViewControl:false,
navigationControlOptions: {style:google.maps.NavigationControlStyle.DEFAULT},
mapTypeControl:true,
mapTypeControlOptions: {style:google.maps.MapTypeControlStyle.DEFAULT}
};
var map = new google.maps.Map(document.getElementById("mymap"),opt);
var marker= new google.maps.Marker({
position: new google.maps.LatLng(3.158578,101.711702),
clickable: true,
animation: google.maps.Animation.BOUNCE,
map: map,
icon: 'images/marker.png'
});
var styles =
[
                {
                featureType:     "all",
                elementType:   "geometry",
                stylers:
                [
                {hue:     "#AD5700"},
                {saturation:        100},
                {lightness: 20}
                ]
                },
                {
                featureType:     "all",
                elementType:   "labels.text",
                stylers:
                [
                {color:   "#4e4e4e"},
                {weight: "0.1"}                ]
                }
];
map.setOptions({styles: styles});
}
// ]]></script>
And this part goes into your “body” section:
In the next step, I will show you how to clean up this code and make it neater a bit!
9. Cleaning the Code with jQuery
We will be using jQuery to make the function available when the document is ready. We will also put the whole initialize function in one javaScript document and load it in the head section. Also, we will separate the CSS into its own style sheet.
So, now, we will have three separate files. One for the HTML, one for the javaScript to create the map, and one for the CSS.
Map.html Content:
<script src="http://ajax.googleapis.com/ajax/libs/jquery/1/jquery.min.js"></script>
<script src="http://maps.google.com/maps/api/js?sensor=false" type="text/javascript"></script>
<script src="prettymap.js" type="text/javascript"></script>
Prettymap.js Content:
$(document).ready(function() {
var latlng = new google.maps.LatLng(3.158578,101.711702);
var opt =
{
center:latlng,
zoom:15,
mapTypeId: google.maps.MapTypeId.ROADMAP,
navigationControl:true,
streetViewControl:false,
navigationControlOptions: {style:google.maps.NavigationControlStyle.DEFAULT},
mapTypeControl:true,
mapTypeControlOptions: {style:google.maps.MapTypeControlStyle.DEFAULT}
};
var map = new google.maps.Map(document.getElementById("mymap"),opt);
var marker= new google.maps.Marker({
position: new google.maps.LatLng(3.158578,101.711702),
clickable: true,
animation: google.maps.Animation.BOUNCE,
map: map,
icon: 'images/marker.png'
});
var styles =
[
                {
                featureType:     "all",
                elementType:   "geometry",
                stylers:
                [
                {hue:     "#AD5700"},
                {saturation:        100},
                {lightness: 20}
                ]
                },
                {
                featureType:     "all",
                elementType:   "labels.text",
                stylers:
                [
                {color:   "#4e4e4e"},
                {weight: "0.1"}
                ]
                }
];
map.setOptions({styles: styles});
});
Styles.css Content:
#mymap
                {
                                width:590px;
                                height:300px;
                                margin:50px auto 0px auto;
                }
And that is it! We are done!
To see a full working example of this tutorial, please Click Here
To download a working example of this tutorial, please Click Here [GitHub]
Hope this was helpful!
For any corrections, comments, or inquiries, please do not hesitate to post a reply or contact me through the contact form!
Have a great day!
Nice article. It did help me. Thanks.
Keep up the good work.
U r most welcome 🙂